Italians call it caffettiera. We call it magic in metal. That tiny stovetop brewer? It’s been waking up households with bold, no-nonsense coffee since the 1930s.
Sure, today’s machines come with touchscreens and milk wands. But the Moka pot? It keeps things real—rich flavor, zero fuss, and a taste of old-school Italian charm.
If you love strong coffee, hate high prices, or just want to level up your morning ritual, you’re in the right place.
This guide will show you exactly how to brew café-style coffee at home that is bold, smooth, and full of soul!
What Is a Moka Pot?
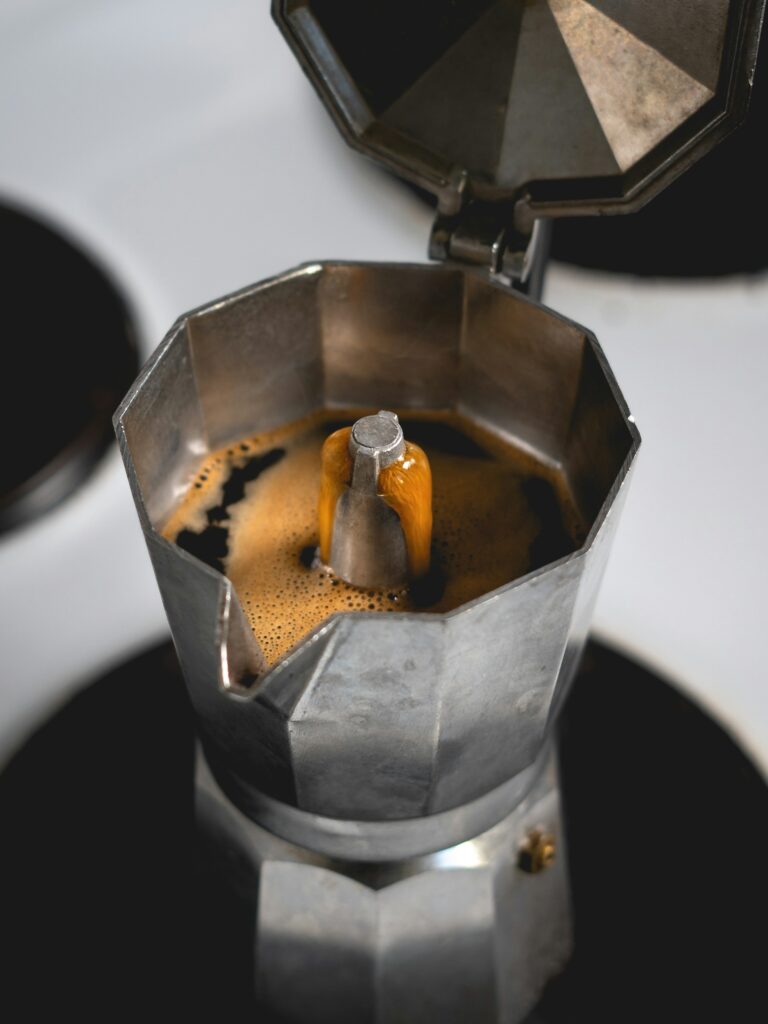
The Moka pot is a small stovetop coffee brewer that was invented in Italy back in the 1930s, and it’s been a staple in Italian kitchens ever since.
At first glance, it might look like a quirky aluminum teapot, but it’s built for serious flavor.
It’s not an espresso machine because there’s no high-pressure pump, but it still produces a strong, bold, concentrated coffee that’s closer to espresso than drip or French press.
Think of it as the middle ground between your average morning cup and a shot of espresso—rich, intense, and deeply satisfying. The design is beautifully simple: it has three main parts.
The bottom chamber holds the water. The filter basket, which sits just above that, holds your ground coffee. Then there’s the upper chamber, where the brewed coffee bubbles up and collects.
As the water heats, pressure forces steam through the grounds and up into the top. No cords, no buttons, but just physics doing its thing. Italians love it for its reliability, flavor, and charm.
It’s the kind of brewer that turns a morning routine into a ritual.
And now, thanks to its affordability and retro appeal, the Moka pot has gone global—brewing strong cups in tiny apartments, campers, dorms, and even high-end kitchens around the world.
What You’ll Need
Ingredients:
- Freshly ground coffee – use 15–20 grams for a 3-cup Moka pot
(Medium-fine grind; not as fine as espresso, but finer than drip) - Filtered water – enough to fill the bottom chamber up to the safety valve
(Approximately 150ml for a 3-cup pot)
Equipment:
- Moka pot – choose the size that fits your needs:
- 3-cup (approx. 5oz yield)
- 6-cup (approx. 10oz yield)
- 9-cup (approx. 15oz yield)
- Heat source – gas stove, electric stove, or induction adapter if your Moka pot isn’t induction-compatible
- Coffee grinder – burr grinder preferred for consistent grind size (only if using whole beans)
Optional Tools:
- Digital scale – for measuring grounds and water accurately
- Thermometer – to preheat water without boiling it (recommended ~70–80°C or 160–175°F)
- Milk frother – if you want to turn your brew into a latte or cappuccino-style drink
Step-by-Step Brewing Instructions
1. Heat the Water First (Optional but Recommended)
Start by boiling water separately before adding it to the Moka pot. Why? Because using preheated water speeds up the brewing process and reduces the time the coffee grounds are exposed to heat.
This helps avoid that burnt, metallic taste some people associate with Moka brews. It’s not mandatory, but it’s a game-changer for smoother flavor.
2. Fill the Bottom Chamber with Hot Water
Carefully pour the hot water into the bottom chamber of the Moka pot. Fill it just below the safety valve and not above it.
That valve is there for a reason, and covering it can mess with pressure control. If you overfill, you risk both weak coffee and dangerous pressure buildup.
3. Fill the Filter Basket with Coffee
Scoop in medium-fine ground coffee—roughly 15–20 grams for a 3-cup pot. Fill the basket evenly, right to the top, but don’t tamp it down like you would with espresso.
Tamping increases resistance, which can lead to overpressure or bitter, over-extracted coffee. Just level it off with a finger or flat edge.
4. Assemble and Seal the Pot Tightly
Now, screw the top and bottom chambers together firmly. Use a towel if the bottom is too hot to handle.
Make sure it’s sealed tight so steam pressure doesn’t leak during brewing. A loose seal = weak brew and messy cleanup.
5. Place Over Low-Medium Heat
Set the pot on your stove over low to medium heat. Too hot, and you’ll burn the coffee. Too cold, and it takes forever. Now, about the lid—some leave it open to watch the magic, others close it to trap heat.
Lid open gives you control; lid closed helps maintain temperature. Your call, but be ready to pounce when the coffee starts rising.
6. Watch and Listen
Here’s where your senses come in. You’ll first hear a soft bubbling, then a gurgle—that’s the sound of brewed coffee pushing into the upper chamber.
When the gurgling turns to a hissing or spitting, that means it’s almost done. Don’t wait for it to finish entirely. Remove the pot from the heat when the upper chamber is about three-quarters full.
Letting it finish on the stove risks overcooking the coffee left in the filter.
7. Cool the Base Immediately (Optional)
This step is extra, but it’s worth it if you’re chasing peak flavor. Run the bottom chamber under cold water or wrap it in a cold towel.
This quickly stops the brewing process and prevents bitter, over-extracted notes from creeping in during the final seconds.
Flavor Tips & Tricks
You’ve got the technique down now, let’s talk about flavor. The Moka pot can make a cup so rich it feels like a warm handshake from an Italian nonna, but only if you treat it right.
These small tweaks turn a good brew into a great one.
Use Fresh Coffee Beans
Stale beans make dull coffee—no way around it. Use freshly roasted Arabica beans or a classic Italian blend with a mix of Arabica and Robusta.
Arabica gives smooth, nutty notes, while Robusta adds strength and a touch of bitterness. If you can, grind your beans right before brewing.
Coffee starts losing flavor minutes after grinding, and the difference between fresh and pre-ground is night and day.
Preheat the Water
It might sound like an extra step, but preheating your water helps avoid bitterness. When you start with cold water, the Moka pot sits on the heat longer, which can overcook the coffee grounds.
Using hot (not boiling) water shortens brew time and keeps the flavors bright, not burnt. It’s a small effort for a smoother, cleaner cup.
Don’t Overpack the Grounds
This is where a lot of people trip up. The Moka pot is not an espresso machine, so you don’t need to tamp the coffee down.
Overpacking restricts the steam from flowing evenly and can lead to bitter or metallic-tasting results. Just fill the basket loosely and level it off. Think “gentle scoop,” not “press like your life depends on it.”
Use Filtered Water
Coffee is about 98% water, so bad water equals bad coffee. Tap water with chlorine or minerals can mess with your flavor.
Filtered or bottled water brings out the true taste of your beans—clean, crisp, and balanced. It’s one of those behind-the-scenes tricks that makes your brew taste like café quality.
Add a Pinch of Salt or Sugar (Italian-Style)
Here’s a fun secret: Italians often sweeten their Moka coffee right in the pot or add a tiny pinch of salt to balance bitterness.
A sprinkle of sugar creates a creamy foam (called cremina), while salt subtly softens sharp flavors. It’s like giving your coffee a personality—smooth but confident.
Mix Before Serving
Once your coffee has finished brewing, don’t just pour and sip. The top layer is often stronger, while the bottom is lighter. Grab a spoon and stir the upper chamber gently before pouring.
This blends all those flavors evenly, giving every cup the same bold, velvety taste. It’s a small move with big results.
Popular Moka Pot Coffee Variations
Classic Italian Style
This is how most Italians take their Moka—black, no sugar, no milk. It’s strong, concentrated, and full of character. Serve it in a small cup, like an espresso shot. No frills, just pure flavor.
Great for early mornings or after a meal. It’s bitter, yes, but in the way dark chocolate or red wine can be: deep, satisfying, and grown-up.
With Sugar (Café Cubano-Style)
Want a touch of sweetness? You’ve got options. The simplest way is to stir 1–2 teaspoons of sugar into your cup. But if you’re feeling fancy, try the café Cubano method.
As the first few drops of coffee hit the cup, whisk them with sugar until you get a creamy foam (espuma). Pour the rest of the coffee over it.
It’s sweet, silky, and has a caramelized kick that balances the strength of the brew.
Moka Latte
Craving something creamy? Turn your Moka coffee into a latte by adding steamed or frothed milk. Use a 1:1 or 1:2 ratio of coffee to milk, depending on how strong you want it.
The Moka base gives it a bold backbone, and the milk smooths it out.
You can also sprinkle a little cinnamon, nutmeg, or vanilla on top if you’re feeling cozy. It’s like a café latte, but homemade and half the price.
Iced Moka Coffee
Hot day? No problem. Brew your Moka coffee, let it cool slightly, then pour it over ice. You can drink it black or add cold milk, cream, or flavored syrups.
It’s refreshing, energizing, and perfect for summer afternoons. Just remember to brew it a bit stronger if you’re adding ice; it’ll dilute otherwise.
Mocha Twist
For a chocolatey upgrade, stir in 1–2 teaspoons of cocoa powder or chocolate syrup directly into your brewed Moka coffee. It melts right in and adds a rich, dessert-like depth.
Top with steamed milk or whipped cream if you want to go full indulgence mode. It’s like a mini café mocha that is warm, sweet, and ridiculously comforting.
Cleaning & Maintenance
Rinse After Every Use – No Soap
After each brew, take the pot apart and rinse all the parts with warm water. No soap, no detergent.
Moka pots—especially aluminum ones—can absorb flavors, and soap can mess with the taste of future brews.
Just give it a thorough rinse and wipe it dry. It’s simple, but it keeps your coffee tasting clean and consistent.
Don’t Put It in the Dishwasher
Tempted to toss it in the dishwasher? Don’t. The high heat and detergents can damage the finish and weaken rubber parts like the gasket.
It might even lead to corrosion over time. Stick with hand washing. It takes a minute, and your pot will thank you.
Avoid Buildup of Old Coffee Oils
Coffee oils can cling to the inside of your Moka pot, especially the filter basket and spout. Over time, this can create a layer of gunk that makes your brew taste bitter or “off.”
Every few uses, take a soft brush or sponge and gently scrub those areas. Don’t go overboard—just enough to keep things fresh without stripping the natural seasoning that builds with use.
Replace Gasket/Rubber Seals Over Time
That rubber ring (the gasket) between the top and bottom chambers? It wears out. If you notice leaking, a loose seal, or reduced pressure, it’s probably time for a new one.
Most gaskets last about 6–12 months with regular use. Replacing it is cheap and easy—just pop the old one out and slide a new one in.
Pros & Cons of Brewing with a Moka Pot
Pros
- Affordable: You don’t need to drop hundreds of dollars on a machine. A solid Moka pot usually costs between $25–$50 and lasts for years.
- Compact and Portable: It’s small enough to tuck into a drawer or suitcase. Perfect for tiny kitchens, campers, or even hotel stovetops when you’re traveling.
- Easy to Use: No fancy buttons or timers—just water, coffee, and heat. Once you learn the rhythm, it’s as easy as brushing your teeth (but far more rewarding).
- Makes Strong, Café-Style Coffee: The Moka pot brews coffee that’s bold, rich, and full of flavor. Not quite espresso, but definitely stronger than drip. Great for lattes, mochas, or sipping straight.
Cons
- Requires Attention: This isn’t a “set it and forget it” brewer. You’ll need to watch and listen, especially during the last minute. A few seconds too long, and the flavor can go bitter.
- Can Over-Extract If Not Watched: Leave it on the heat too long, and you’ll burn the coffee. Timing and temperature matter more here than with some other methods.
- Not True Espresso (No Crema): While it comes close in strength, it doesn’t build pressure like a real espresso machine, so you won’t get that signature crema on top.
Final Words
The Moka pot is proof that great coffee doesn’t need fancy buttons or big budgets. It’s old-school charm, bold flavor, and pure simplicity all packed into one little metal pot.
But it’s more than just coffee—it’s a ritual. The hiss, the gurgle, the aroma filling the kitchen—it all feels alive. It’s coffee with personality.
So dust off that Moka pot (or grab one if you don’t have it yet), experiment with your favorite beans, and bring a little Italian soul into your mornings.
One brew, and you’ll see why it’s been loved for generations!
FAQs
Can I use espresso grind in a Moka pot?
Only if you love bitterness. The espresso grind is too fine and can clog the filter or lead to over-extraction. Stick with a medium-fine grind—just a notch coarser than espresso.
Does it work on induction stoves?
Not always. Traditional aluminum Moka pots won’t heat on induction unless they have a compatible base. You’ll need either a stainless steel Moka pot or an induction adapter plate.
How long does it take?
From start to sip, about 5–10 minutes. It depends on your heat source, water temperature, and pot size. Preheating water can speed things up.
Is aluminum safe?
Yes, it’s safe for most people. But if you’re concerned, go for a stainless steel model. It’s non-reactive, dishwasher-friendly (if you dare), and built to last.
Can I froth milk separately?
Absolutely. Use a handheld frother, electric wand, or even a French press. Moka coffee + frothed milk = a café-style latte without the café price.

Moka Pot Mastery: How to Brew Bold Italian Coffee at Home
Course: Brewing GuidesCuisine: ItalianDifficulty: Easy2
cups5
minutes5
minutes10
minutesBrew rich, bold Italian-style coffee at home with a classic stovetop Moka pot—simple, strong, and full of flavor.
Ingredients
15–20g medium-fine ground coffee (not espresso-fine)
150ml filtered water (or enough to fill below the valve)
Directions
- Preheat water to about 70–80°C (160–175°F).
- Fill the bottom chamber of the Moka pot with hot water—just below the valve.
- Add ground coffee to the filter basket, level it off, but don’t tamp.
- Assemble the pot tightly and place it over low to medium heat.
- Leave lid open or closed—your choice. Watch closely.
- When the coffee starts gurgling and the top chamber is ¾ full, remove from heat.
- (Optional) Run the base under cold water to stop brewing.
- Stir coffee in the top chamber before serving for a balanced flavor.
Notes
- Use fresh beans for the best flavor.
- Avoid soap when cleaning—just rinse and dry.
- Want a twist? Add steamed milk, sugar, or a bit of cocoa for your own spin.
Hi, I’m Selene Veyra! I’m the coffee-loving creator of Brewed Moments. My passion for coffee began in my grandmother’s kitchen, where her morning brew sparked a lifelong love for the beverage. Now I test brewing methods, gear, and homemade café-style recipes to make great coffee simple for everyone ☕


