There’s something almost meditative about making pour-over coffee.
It slows you down, makes you pay attention, and rewards you with a cup that tastes brighter and cleaner than anything from a drip machine.
Unlike pushing a button and walking away, this method gives you full control over flavor, strength, and experience.
At its core, pour-over is simple: hot water, fresh grounds, and a filter. Yet the results can feel like café-level magic.
In this guide, I’ll walk you step by step through the process so you can master it at home and start your mornings with a brew that feels like a ritual, not a routine!
What Is Pour-Over Coffee?
Pour-over coffee is exactly what it sounds like—you brew by slowly pouring hot water over freshly ground beans in a filter, letting gravity and time do the work.
Unlike an automatic drip machine that sprays water unevenly and leaves you guessing, pour-over gives you control over every drop.
Compared to a French press, there’s no muddy texture or heavy oils clouding the cup; instead, you get clean, crisp flavors that highlight the unique notes of the beans.
The beauty lies in the details because you control water temperature, pour speed, and coffee-to-water ratio, which means you’re the conductor of your own mini symphony in a mug.
It’s not just about drinking coffee; it’s about enjoying the ritual.
The gentle spiral of water, the bloom of the grounds, the aroma filling the room—it all turns a simple act into a calming routine that feels worlds away from rushing through a drive-thru.
Essential Equipment You’ll Need
To make pour-over coffee at home, you’ll need a few simple tools that make a big difference.
- Pour-over brewer: V60, Chemex, or Kalita Wave—each one works; just pick your style.
- Filters: Paper for a crisp, clean cup, or reusable cloth/metal for less waste and a fuller body.
- Gooseneck kettle: Gives you steady, controlled pours that a regular spout just can’t manage.
- Coffee grinder: A burr grinder is best for even grounds; blade grinders are unpredictable.
- Digital scale: Ensures perfect coffee-to-water ratios every time—no more guessing.
- Timer: A phone timer works fine to keep brew times consistent.
- Mug or carafe: The final stop for your brew—catch that liquid gold and enjoy.
Choosing the Right Coffee Beans
Freshness
Good pour-over starts with fresh beans. Whole beans are always better than pre-ground because once coffee is ground, it begins losing its flavor almost immediately.
Check the roast date on the bag—anything within the past two to three weeks is ideal. Think of it like bread: a fresh loaf has life, while a stale slice feels flat.
Roast Level
For pour-over, light to medium roasts are usually the sweet spot. They highlight the natural flavors and bring out fruity, floral, or nutty notes depending on the origin.
Dark roasts can work, but they often overpower the delicate clarity that pour-over is known for. If you want to taste the unique character of your beans, stay on the lighter side.
Grind Size
Grind size makes or breaks your cup. For pour-over, a medium-fine grind works best—roughly the texture of table salt.
Too coarse, and your water will run through too fast, leaving your coffee weak and sour. Too fine, and the water will linger too long, turning it bitter.
Dialing in grind size takes a little experimenting, but once you find the sweet spot, you’ll taste the difference.
Ratio Basics
The golden rule of pour-over is balance. A standard ratio of coffee to water falls between 1:15 and 1:17. That means for every gram of coffee, use 15–17 grams of water.
For example, 20 grams of coffee pairs well with about 300 grams of water.
Using a digital scale makes this easy and consistent. Ratios aren’t set in stone, so adjust them if you prefer a stronger or lighter brew, but this range is the perfect starting point.
Step-by-Step Brewing Guide
Step 1: Heat Water
Start by heating your water to about 200°F—just off the boil. If you don’t have a thermometer, simply bring the water to a boil, then let it rest for 30 seconds.
Water that’s too hot scorches the coffee; too cool and it won’t extract enough flavor. Getting this right sets the tone for the whole brew.
Step 2: Prepare Filter
Place your filter in the brewer and rinse it thoroughly with hot water. This removes any papery taste and warms up your dripper at the same time.
Dump the rinse water before you start brewing so your coffee doesn’t get diluted.
Step 3: Weigh & Grind Coffee
Measure your coffee on a digital scale for consistency—20 grams of coffee to 300 grams of water is a solid starting point. Grind it to a medium-fine texture, like table salt.
Fresh, even grounds are the foundation of a great cup.
Step 4: Add Coffee to the Filter
Pour your ground coffee into the rinsed filter. Gently shake or tap the brewer to level the grounds. This creates a flat bed so the water can flow evenly through every particle of coffee.
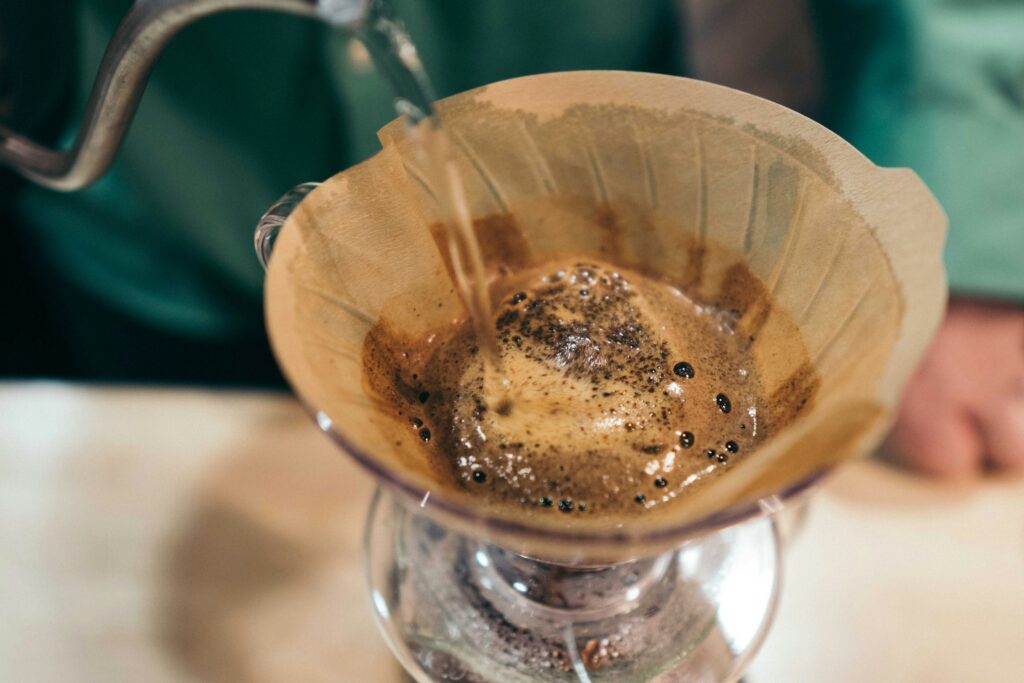
Step 5: Bloom
Pour about twice the weight of your coffee in water—around 40 grams if you’re using 20 grams of coffee. Make sure all the grounds are wet, then let it sit for 30–45 seconds.
This “bloom” releases trapped gases and preps the coffee for even extraction.
Step 6: Pour Technique
After the bloom, start your main pour in slow, steady circles. Don’t dump all the water at once—think of it like watering a delicate plant.
Pour in stages, keeping the water level consistent and allowing it to drain slightly before adding more. This helps extract flavor without bitterness.
Step 7: Total Brew Time
Aim for a total brew time of 3–4 minutes from start to finish. If your coffee finishes too quickly, try a finer grind; if it drags on too long, go a bit coarser. Small adjustments make a big difference.
Step 8: Serve & Enjoy
Once the dripping stops, remove the brewer and give your coffee a gentle swirl. This mixes the layers of extraction for a balanced taste.
Pour it into your favorite mug, take a sip, and enjoy the bright, clear flavors you just created.
Tips for Better Results
Adjust Grind Size
Your grind size is the steering wheel of pour-over brewing. If your coffee tastes bitter, the grind is probably too fine, which means the water is spending too much time with the grounds.
If it tastes sour or weak, it’s likely too coarse, and the water rushed through too fast.
Use Filtered Water
Coffee is about 98% water, so the quality of that water matters. Tap water heavy with chlorine or minerals can leave strange aftertastes.
Filtered water makes the flavors pop cleaner and brighter, letting the beans shine instead of the faucet. If your coffee tastes “off” no matter what you try, start with your water.
Preheat Everything
A cold mug or brewer can sap heat from your brew before it even hits your lips. Pour hot water through your kettle, brewer, and mug to warm them up.
Keep Notes
Every coffee bean is different, and so is every person’s taste. Keep a simple log of your ratios, grind settings, and brew times. Jot down how the cup turned out—too bitter, too sour, just right.
Over time, those notes become a roadmap to your perfect pour-over, saving you guesswork and wasted beans.
Common Mistakes to Avoid
Pouring Too Quickly
If you rush the pour, the water doesn’t have enough contact time with the grounds. The result? A weak, under-extracted cup that tastes more like tinted water than coffee.
Slow, steady spirals are the name of the game. Imagine watering a plant—you wouldn’t dump the whole jug at once, right? Same idea here.
Not Blooming Properly
Skipping or rushing the bloom leads to uneven extraction. Those trapped gases in fresh coffee need a chance to escape, or they’ll block water from reaching the grounds evenly.
Without it, some parts brew while others barely get touched. The fix is easy: a quick 30–45 second pause after the first pour makes all the difference.
Using Old Beans
Coffee isn’t wine—it doesn’t get better with age. Old beans lose their aroma and punch, leaving you with a flat, lifeless brew.
Always check the roast date and aim for beans roasted within the last few weeks.
Skipping the Rinse
If you’re using paper filters, rinsing is non-negotiable. Without it, you risk that papery flavor sneaking into your cup.
A quick rinse also preheats your brewer, which helps keep the brewing temperature stable. It’s a tiny step that saves you from a “why does this taste like cardboard?” moment later.
Flavor Variations to Try
Different Origins
Not all beans are created equal, and that’s where the fun begins. Ethiopian beans often burst with fruity, floral notes, while Colombian beans are smooth, nutty, and balanced.
Exploring origins is like traveling the world through your mug—you taste the soil, the climate, and the culture in every sip. Try swapping regions now and then; your taste buds will thank you.
Playing With Ratios
The coffee-to-water ratio is more than just numbers—it’s a dial for strength and character. Stick with the standard 1:15 to 1:17 to start, then tweak to your liking.
Want a bolder cup that smacks you awake? Go stronger with a 1:15 ratio. Craving something lighter and more delicate? Stretch it closer to 1:17.
Tiny shifts can create big changes, so experiment until it feels just right.
Adding Spices
Sometimes, a sprinkle of spice takes things from good to “wow, what is this?” Cinnamon adds warmth, cardamom brings a floral twist, and nutmeg offers a cozy depth.
Simply mix a pinch into your grounds before brewing. It’s an easy way to jazz up your cup without reaching for syrups or creamers.
Just don’t go overboard because you want the spice to complement, not steal the spotlight.
Trying Iced Pour-Over
Who says pour-over is only for hot coffee? Pour your brew directly over ice, and you’ve got a crisp, refreshing version perfect for warm days.
The ice chills the coffee instantly, locking in those bright, clean flavors. Use a slightly stronger ratio since the ice will dilute it a bit. It’s basically café-quality iced coffee without leaving your kitchen.
Final Words
Pour-over is proof that simple methods can deliver big rewards. A kettle, a filter, and a little patience are all it takes to unlock flavors you never thought your beans could hold.
Start small, keep it fun, and let the ritual become part of your day. Every cup is a chance to learn, tweak, and taste something new.
Grab a gooseneck kettle and try your first pour-over this week—you’ll never look at drip coffee the same way again!
FAQs
Can I use regular ground coffee for pour-over?
You can, but it’s not ideal. Pre-ground coffee is often too fine or too coarse, and it loses freshness quickly. Whole beans ground just before brewing will always taste better.
What’s the ideal water temperature if I don’t have a thermometer?
Bring your water to a boil, then let it sit for about 30 seconds. That usually lands you close to the sweet spot of 200°F.
How long does it take to make a pour-over?
From heating the water to sipping your cup, it takes about 4–5 minutes. The actual brewing is only 3–4 minutes, so it’s quick once you get going.
Do I really need a scale, or can I eyeball it?
A scale gives you consistency, but you can eyeball if you must. Just know the results may vary, and one cup might taste different from the next.
If you fall in love with pour-over, a cheap digital scale is worth every cent.
Which pour-over dripper is best for beginners?
The Hario V60 and Kalita Wave are both great starter options. The Chemex is also popular if you like brewing larger batches. Choose one that fits your style because there’s no wrong answer.

Step-by-Step Guide to Making Pour-Over Coffee at Home
Course: Brewing GuidesDifficulty: Beginner1
cup2
minutes4
minutes6
minutesIngredients
20g fresh coffee beans (medium roast recommended)
300g hot water (~200°F / just off boil)
Directions
- Heat water to about 200°F (boil, then rest 30 seconds).
- Place a filter in your dripper and rinse with hot water. Discard rinse water.
- Grind beans to medium-fine (like table salt) and add to the filter.
- Start bloom: pour 40g of water evenly over grounds. Let sit 30–45 seconds.
- Continue pouring in slow, circular motions until you reach 300g total water.
- Allow coffee to drain completely (3–4 minutes total brew time).
- Swirl gently, serve, and enjoy.
Notes
- Adjust the grind finer if the coffee tastes weak; coarser if it tastes bitter.
- Use filtered water for the cleanest flavor.
- Scale ratios up or down depending on serving size (1:15–1:17 ratio is ideal).
Hi, I’m Selene Veyra! I’m the coffee-loving creator of Brewed Moments. My passion for coffee began in my grandmother’s kitchen, where her morning brew sparked a lifelong love for the beverage. Now I test brewing methods, gear, and homemade café-style recipes to make great coffee simple for everyone ☕


